

Memo House

How to Organise a Small Kitchen: A Step-by-Step Guide for UK Homes

  • Home
  • Home Organization

How to Organise a Small Kitchen: A Step-by-Step Guide for UK Homes

  • September 10, 2026

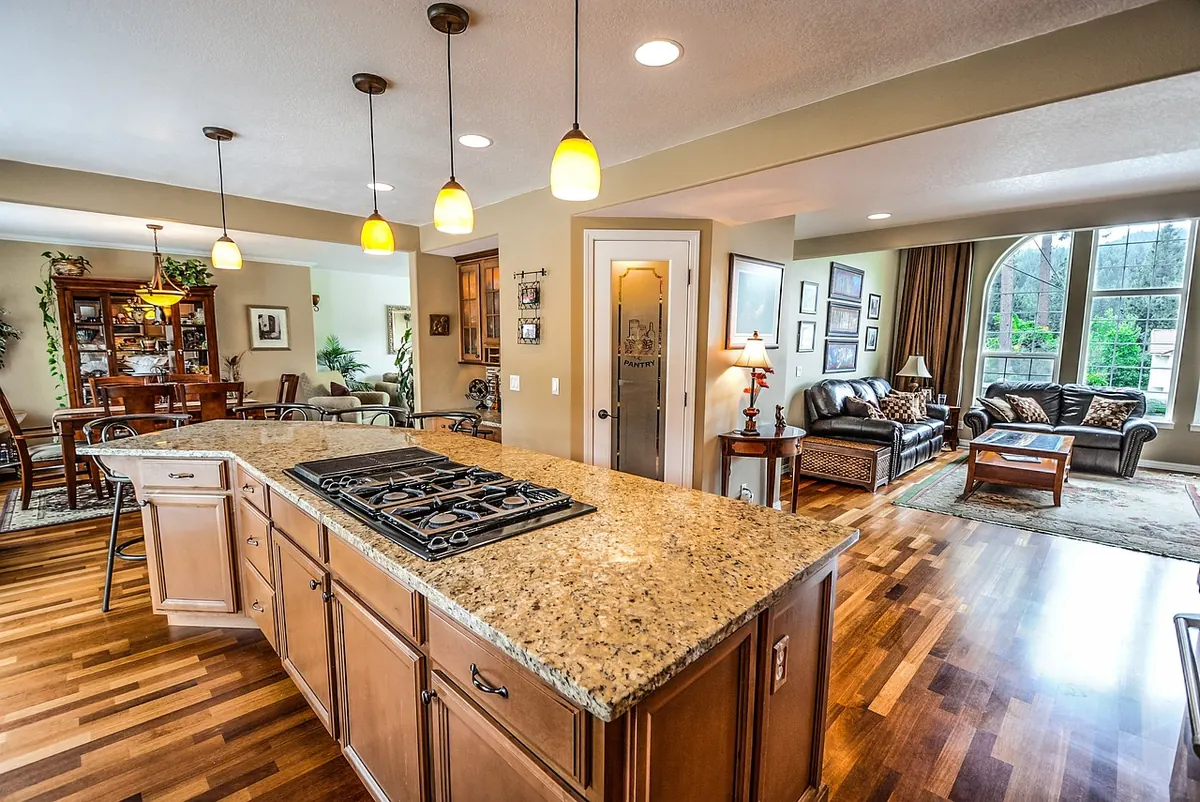
Most small kitchens don't fail for lack of space. They fail because the space they have sits in the wrong place: the pans live across the room from the hob, the chopping board has nowhere to land, and the one clear stretch of worktop is buried under a slow cooker and a fruit bowl.

Sorting that out doesn't call for a new kitchen. It calls for zoning, a tape measure, and a bit of discipline about what earns a place on the worktop. Work through it in this order and you'll feel the difference the first time you cook a proper meal.

Start with zones, not storage

Before you buy a single basket, watch yourself make dinner. Notice where you stand, what you turn to reach, and how many times you cross the room. In a compact kitchen the classic work triangle matters less than simple adjacency — the right things within arm's reach of the job they belong to.

The zones worth naming

  • Prep: chopping board, knives, a bowl for peelings, and the bin within a step.
  • Cooking: pans, oils, seasoning, wooden spoons and oven gloves around the hob.
  • Washing: sink, draining board, cloths, washing-up liquid, bin.
  • Drinks and breakfast: kettle, mugs, tea, coffee, toaster.
  • Landing and serving: one clear patch to set down a hot tray or a full plate.

In a small room these zones will overlap, and that's fine. A pull-out board over the sink becomes temporary prep space; a drawer under the hob holds the pans. What matters is that each task's kit lives together, rather than scattered according to what happened to fit where.

Measure before you buy anything

Containers sold as "small" are rarely the size you actually need, and a stack of mismatched boxes wastes more room than it saves. Spend twenty minutes with a tape measure first.

What to write down

  • The internal width, depth and height of every shelf, in millimetres.
  • The width of the cupboard opening — it is almost always narrower than the inside.
  • The clearance between the worktop and the underside of your wall units, usually somewhere around 450–500mm. Anything taller won't fit there.
  • Internal drawer depth at the front and the back, since many drawers taper.
  • What's happening under the sink: pipework, a boiler, a waste disposal, a stopcock.
  • Where the sockets are, and how far each appliance's flex reaches.

Then measure your tallest possessions — the blender jug, the stockpot, the cereal boxes — and the largest flat thing you own, whether that's a roasting tin or a baking tray. Fit storage around those, not the other way round.

A tape measure is cheaper than a cupboard full of containers that don't fit.

Make your worktop work harder

Worktop is the scarcest surface in a small kitchen, so treat every item on it as a tenant who has to justify the rent.

  • Keep one genuinely clear landing area — roughly the size of a chopping board and a little more. Defend it.
  • Only daily items stay out. A kettle earns its place; an air fryer used twice a week does not, however convenient it feels.
  • Go up rather than out. A wall rail for utensils, a shelf on a riser above the toaster, or a magnetic strip for knives — though keep sharp edges well out of reach of children.
  • Corral the clutter. A shallow tray for oils and seasoning lets you lift the whole lot in one go and wipe underneath.
  • Consider movable surfaces: a slim trolley you can wheel into the middle of the floor, or a board that sits over the sink when you need extra room to chop.

Push everything back against the wall where you can. Clearing the front 100mm of a worktop makes a narrow galley feel considerably less cramped.

Sort cupboards by how often you reach for things

Frequency beats category. The shelf you can reach without bending or stretching is prime property, and it should hold what you use most.

  • Every day: plates, mugs, glasses, the pan you actually cook with, tea and coffee — waist to eye height.
  • Weekly: serving dishes, baking tins, the second chopping board — mid shelves and easy drawers.
  • Occasionally: the big roasting tin, the cake stand, the fondue set — top shelves and the back of low cupboards.
  • Bulk and seasonal: spare tins, Christmas kit, picnic gear — anywhere out of the way, including above the fridge.

Deep cupboards need a system or they become a graveyard. Put the least-used items at the back and the everyday ones at the front, or fit a pull-out basket or turntable so nothing disappears behind anything else. Square containers use the space far better than round ones. Decant bulky packets into labelled jars and you'll claw back shelf height you didn't know you had. As for lids, keep them in one box matched to their bases with an elastic band, or replace the lot with a single stackable set.

Deal with the awkward spots

Every compact kitchen has three or four places that seem useless. Most of them can be rescued.

  • Under the sink: pipework eats the middle, so use shallow stacking drawers or slim baskets on either side, and a rail around the pipes for cloths and bags.
  • Inside doors: racks for foil, cling film and bin liners work well, but don't overload hinges — heavy items will pull a door out of alignment.
  • Corners: a carousel earns its keep. Without one, keep only occasional items at the back, in a labelled box you can lift out in one movement.
  • The plinth: some kitchens have a 100–150mm gap below the base units. Plinth drawers exist and can be fitted, but check the clearance first and use a joiner if you're unsure.
  • Above and beside: a shelf above the door, a basket on top of the wall units, and hooks on the outside of the kitchen door for aprons and bags.

One caution: keep cleaning products away from food storage, never decant anything into an unlabelled container that could be mistaken for food, and leave the vents on fridges, ovens and microwaves clear.

Habits that keep it working

A neatly zoned kitchen stays that way through small routines, not annual clear-outs. Try a sixty-second reset before bed: dishes off the draining board, worktops wiped and clear, nothing left on the hob. Adopt a one-in-one-out rule for mugs, plastic tubs and takeaway containers, which multiply quietly in the dark. When something has no obvious home, name one — the reason a worktop fills up is usually that three items have nowhere else to go. And if you're mid-sort and can't decide, put the item in a box with the date on it. If you haven't opened it in six months, you've answered the question.

A realistic weekend plan

  1. Pick the cupboard you open most, and empty it completely. One cupboard at a time — this is not a demolition job.
  2. Clean the shelves and measure them properly while they're bare.
  3. Put back only what belongs to that cupboard's zone, arranged by frequency. Everything else goes in a box to be rehomed later.
  4. Repeat with the two or three cupboards that matter most, then stop for the day.
  5. On day two, clear the worktops entirely and decide what genuinely lives on them.
  6. Finish by labelling anything decanted, and walk through making a cup of tea and a simple dinner to check the zones hold up.

Don't try to finish in one weekend, and don't buy storage until you've measured and cleared. A small kitchen that's been zoned, measured and stripped back will outwork a larger one that's simply full.

Photo: user32212 / Pixabay
Copyright © 2026 Memo House. All rights reserved. Memo House.